
Table of Contents
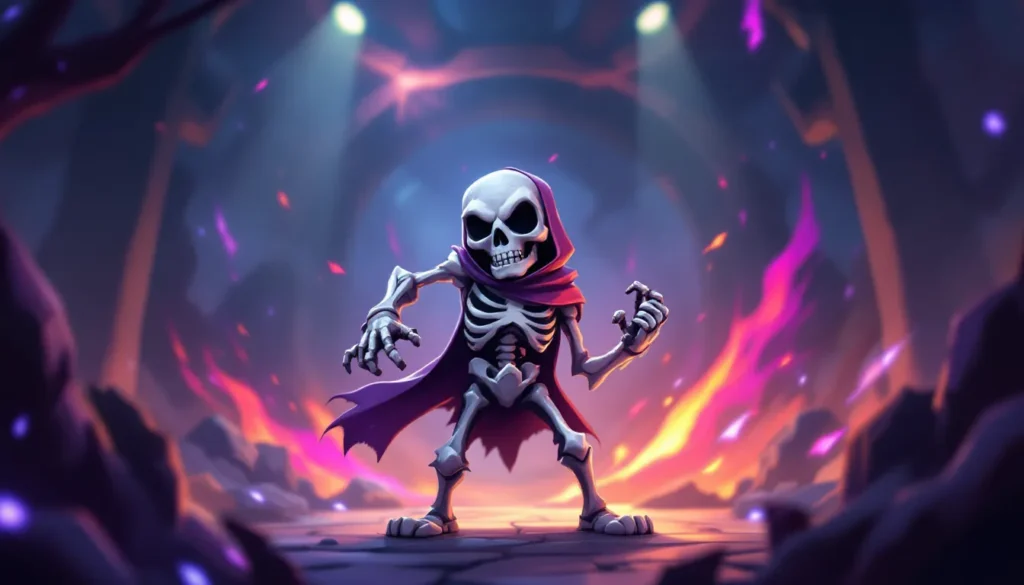
ToggleThe Skeleton, one of Clash Royale’s most deceptively humble units, has been a staple card since the game’s launch. While newer players often overlook these bony warriors, experienced players know that a well-placed Skeleton can be the difference between a successful push and a defensive hold. Whether you’re running them in swarm-based strategies, using them for chip damage, or leveraging them as cheap support, understanding how to maximize this 1-elixir card is crucial to climbing ladder and dominating in competitive play. This guide covers everything from fundamental stats to advanced placement tactics, counter strategies, and how skeletons stack up against their evolved forms, Skeleton Army, Giant Skeleton, and Skeleton King. Let’s dig into what makes these undead fighters tick.
Key Takeaways
- Skeleton is the most cost-efficient 1-elixir troop in Clash Royale, versatile enough to function in cycle decks, bait strategies, and control lists across all trophy ranges.
- Master skeleton placement timing and kiting mechanics—dropping them in the path of melee threats forces them toward your tower, saving 100+ damage while maintaining positive elixir trades.
- Skeleton decks thrive on decision-making by cycling cheap units to reach win conditions faster; pair skeletons with win conditions like Hog Rider or use them for chip damage strategies to accumulate tower pressure over time.
- Area-damage spells like Fireball and Poison are the primary counter to skeleton-based strategies, making spell-bait synergies with Goblin Barrel essential to punish opponents who commit their counters.
- Skeleton differs fundamentally from its evolved forms—Skeleton Army excels at swarming offense, Giant Skeleton functions as a beatdown tank, and Skeleton King serves as a dedicated win condition, each requiring different deck-building approaches.
What Is The Skeleton Card?
The Skeleton is a 1-elixir Common troop that’s been a core card in Clash Royale since day one. It’s the most cost-efficient unit in the game when you look at raw elixir efficiency, and that simplicity is its greatest strength. You’re getting a single melee attacker with modest stats, but the low cost means you can spam them, cycle through your deck quickly, or use them as throwaway distractions without fear of over-committing resources.
Skeletons form the backbone of multiple archetype strategies. They appear in bait decks as cannon fodder to waste enemy spells, in cycle decks where their quick deployment helps you reach your win condition faster, and in some control lists as cheap defensive units that can kite or distract larger threats. The skeleton clash royale card design is intentionally flexible, it’s not a “win the game” unit, but rather a utility piece that enables better cards to do their job.
What makes skeletons so popular at all trophy ranges is their versatility. New players use them because they’re cheap and easy to understand. Professional players use them because they generate positive elixir trades when used correctly. That duality rarely exists in Clash Royale, which is why the Skeleton remains meta-relevant across multiple seasons.
Skeleton Card Stats and Mechanics
Elixir Cost and Rarity
The Skeleton costs a mere 1 elixir, making it the cheapest troop in the game. Its Common rarity means it reaches max level easily and consistently, no legendary rarity gatekeeping here. The 1-elixir price point is the card’s primary identity. At that cost, you’re not expecting a powerhouse: you’re expecting utility. This is exactly why a well-placed Skeleton can swing a matchup. You can afford to use multiple copies in quick succession without eating into your elixir bar significantly.
Hit Points, Damage, and Attack Speed
At tournament standard (Level 9), a Skeleton has 47 HP, deals 34 damage per hit, and attacks every 1.1 seconds. These numbers scale slightly with card level, at Level 14, those stats sit at approximately 59 HP, 42 damage, and the same attack speed. The DPS (damage per second) hovers around 31 at tournament standard, which is low compared to damage-focused units like the Mini P.E.K.K.A, but the point isn’t raw damage output.
The Skeleton’s strength lies in its attack speed consistency and low durability threshold. It dies to most area-damage spells (Log, Arrows, Fireball) and single-target killers (Mini P.E.K.K.A, Musketeer). This fragility is intentional, it forces opponents to make a decision: spend resources killing it, or let it chip away. Either way, you’re creating value through decision-making rather than pure stats.
Deployment and Range
Skeletons deploy instantly with no wind-up or delay, and they have a melee range of 0.5 tiles. This means they need to get right next to their target to attack. The instant deployment is crucial for cycle decks and defense, you can drop a Skeleton in response to threats with minimal reaction time. The melee range, but, is their vulnerability. They can’t attack from behind walls or towers, and ranged units will kite them easily. This is why placement matters so much: you’re not dropping a Skeleton in the center lane hoping it works. You’re placing it with purpose: to distract a specific threat, to cycle elixir, or to add support to a push.
Best Skeleton Decks and Synergies
Skeleton in Control Decks
Control decks thrive on positive elixir trades and punishing opponent overcommitment. Skeletons fit perfectly here as cheap cycle units and low-elixir defense. Pairing skeletons with Cannon or Inferno Tower creates a defensive shell that’s hard to break. Your opponent pushes, you defend with the skeleton and tower, and the low elixir investment means you’re back up to offensive pressure in seconds.
Skeleton + Kite strategy is central to control. Drop a Skeleton on a Mini P.E.K.K.A or Hog Rider, and it kites the threat toward your tower while dealing chip damage. By the time the threat reaches your tower, it’s already taken 100+ damage. The skeleton dies, as expected, but the elixir trade is positive when combined with your building’s damage. This pattern repeats throughout a match, and suddenly your opponent’s win condition is neutralized.
Skeleton in Bait Decks
Bait decks force opponents to use spells on small troops, leaving those spells unavailable when they’re really needed. Skeletons are perfect bait. Pair them with Goblin Barrel or Princess, and your opponent faces a dilemma: use Log on the skeletons (leaving Barrel/Princess alive), or ignore them and take damage. Most competitive skeletons clash royale lists in the bait archetype use this principle ruthlessly.
A typical bait shell might look like: Skeleton, Goblin Barrel, Princess, Inferno Dragon, and Knight. The Skeleton’s 1-elixir cost makes it ideal cycle fuel when you’re fishing for Barrel hits. It also serves as a secondary win condition when your Barrel is locked by opponent defense, the Skeleton chip adds up over time, especially in double-elixir. The key is relentless cycling: drop cheap units, generate pressure, and punish overcommitted defense with your Barrel.
Skeleton in Swarm-Based Strategies
Swarm decks multiply units to overwhelm defenses. While individual Skeletons aren’t threatening, multiple Skeletons attacking the same target create overwhelming pressure. Combining Skeleton with Skeleton Army or Bats amplifies this effect. A single Skeleton might be kited by a defensive building, but three Skeletons attacking simultaneously will burn through that building fast.
Swarm synergies also work with Goblin and Spear Goblin variants. The idea is to stack cheap units so that any area-damage counter leaves at least one threat standing. This is where elixir advantage becomes critical, you’re forcing your opponent to spend 5+ elixir on a Fireball or Poison to deal with your 3-4 elixir swarm. That trade is favorable, and with careful timing, you repeat it throughout the match.
Offensive Strategies Using Skeletons
Skeleton As A Cheap Win Condition Support
Skeletons rarely win games solo, their low damage output and fragility prevent that. Instead, they support actual win conditions like Hog Rider, Giant, or P.E.K.K.A. Pair a Skeleton with a Hog push, and your opponent now has to deal with two threats. If they focus the Hog with swarm, the Skeleton chips the tower. If they defend the Skeleton, the Hog gets free hits.
This is particularly effective in cycle-focused decks where your win condition is repeated small pushes rather than one massive attack. You’re not building a “mega push” that costs 15+ elixir, you’re cycling Hog + Skeleton repeatedly, making your opponent bleed out over time. The Skeleton costs so little that it barely delays your next Hog cycle.
Skeleton For Chip Damage
Chip damage strategies aim to reduce the tower’s health to zero through accumulated small hits rather than one catastrophic push. Skeletons excel at this role when paired with ranged support. A Musketeer or Archer protected by a Skeleton can poke at the tower repeatedly. The Skeleton doesn’t do much damage, but it forces the opponent to respond. If they ignore it, both units attack. If they defend it, they’re using resources on the tank rather than the actual damage dealer.
Mirror decks and rocket-cycle decks sometimes run skeletons for this exact reason. In the late game, when both players are low on elixir, a single Skeleton pushing with your ranged unit buys time and guarantees a few tower hits per cycle. Over ten cycles, that’s 40+ tower damage, meaningful in a tight match.
Skeleton Push Combos
Pro players build “skeleton push” combos by stacking the unit with other cheap troops in a specific order. For example, Skeleton + Goblin + Spear Goblin creates a diverse threat where one card counter doesn’t solve all three. If your opponent plays Arrows to kill the Spear Goblin, the Skeleton and Goblin push through. If they play Fireball, you’re getting hit damage that would’ve been coming anyway.
Another classic combo is Skeleton + Knight. The Knight is a melee tank that advances slowly: the Skeleton provides damage from behind. This push is devastating if your opponent over-committed elsewhere. It’s cheap enough to cycle into later pushes and expensive enough that it actually threatens the tower if left alone. The key is recognizing when your opponent is low on elixir and can’t defend, then piling on cheap troops to maximize damage.
Defensive Uses and Counter Placements
Defending Against Melee Troops
Melee units like Hog Rider, Mini P.E.K.K.A, and Dark Prince are threats because they reach your tower quickly. A Skeleton placed in their path kites them backward toward your tower, reducing the damage they deal. This is foundational defense: the Skeleton doesn’t kill the threat, but it buys time for your tower to fire and for you to build a larger defense.
The placement is critical. Drop the Skeleton in the path of the incoming threat, not on the tower itself. If you place it on the tower, the threat ignores it and goes straight for the tower. If you place it in the lane, the threat targets it, steps forward to attack, and walks backward as the Skeleton kites. This small repositioning can mean 100+ tower damage saved. When layered with other defenders, that adds up significantly.
Defending Against Ranged Units
Ranged units like Musketeer, Inferno Dragon, and Electro Giant are harder to defend against because they attack from a distance. A lone Skeleton won’t stop them, but it can delay their damage slightly. Pairing the Skeleton with a building like Cannon or Tesla creates a complete defense. The Skeleton draws aggro, the building damages the ranged threat, and often the threat dies before reaching your tower.
The synergy is particularly strong against Electro Giant. EG destroys buildings on contact, but if a Skeleton is in its way, it targets the Skeleton first, giving your building an extra second of DPS. In double-elixir, that second can mean the difference between EG staying alive or dying. Defending ranged threats with Skeletons requires patience and understanding which units your Skeleton can actually kite (most can’t, but it still buys time).
Tank Distractions and Kiting
Tanks like Giant and Golem are designed to soak damage while support units attack. A Skeleton alone can’t distract them meaningfully, but multiple Skeletons attacking different tank support units creates chaos. If you drop a Skeleton on the Giant and another on the Giant’s Musketeer support, you’re forcing your opponent to decide which threat to prioritize.
Kiting works best when you have a building backing you up. Skeleton + Inferno Tower against a P.E.K.K.A is a classic matchup. The Skeleton kites the P.E.K.K.A while the Inferno Tower charges up and burns it down. The P.E.K.K.A might destroy the Inferno Tower in the process, but it dies shortly after, you got a 7-elixir unit for a 1-elixir + 5-elixir trade. That’s positive elixir trade in action.
Skeleton Variations: Army vs. Giant vs. King
Skeleton Army Strengths and Weaknesses
Skeleton Army costs 5 elixir and spawns roughly 15 individual Skeletons that attack in unison. It’s a swarm archetype taken to the extreme. Where the single Skeleton fails (raw damage output), the Army succeeds spectacularly. Fifteen units attacking simultaneously deal massive DPS, enough to burn through Inferno Dragons, P.E.K.K.A.s, and even Golems if left undefended.
But, the Army is vulnerable to area-damage spells. A single Fireball, Poison, Lightning, or Log can wipe out a significant portion of the Army, sometimes killing all of it if the spell lands well. This is why Skeleton Army decks are often bait-focused: you’re forcing your opponent to commit spells to your Army, leaving them vulnerable to Goblin Barrel or other spell-intensive threats. The Army is also slower to deploy than individual Skeletons, giving opponents reaction time.
The key difference from single Skeletons: the Army is an offensive card. You’re pushing with it, and your opponent must respond immediately or the Army wins the match. Single Skeletons are defensive/cyclic units. You’re not pushing with a Skeleton to win, you’re using it to support better cards or create efficiency advantages. Skeleton Army requires commitment: single Skeletons require timing and patience.
Giant Skeleton Comparison
Giant Skeleton costs 6 elixir and is a slow, tanky unit that explodes on death, dealing area damage and knocking back units. It’s fundamentally different from the regular Skeleton. While the Skeleton is a speed-focused, cheap unit, Giant Skeleton is a tank with an explosive gimmick. It’s not designed for quick cycling or defense, it’s a melee tank with a bomb.
Giant Skeleton appears in beatdown or tank decks where you’re building a heavy push around a single large unit. When it dies (and it will, because it’s slow and expensive), the explosion chip-damages the tower and knocks back defenders. This creates opportunities for support units to pressure the tower. But, the 6-elixir cost means you’re not using Giant Skeleton for cycling or casual defense. It’s a commitment.
Comparison: Skeleton is to cycle as Giant Skeleton is to beatdown. They share a theme but serve entirely different purposes. You wouldn’t swap them in a deck, they occupy different roles.
Skeleton King Comparison
Skeleton King is a 7-elixir legendary that spawns skeletons on hit and on death, essentially creating waves of smaller Skeletons as it attacks. It’s a hybrid unit that combines the swarming nature of Skeleton Army with the single-unit pressure of a tank. The King deals consistent damage while generating additional units, making it a threat on both offense and defense.
Skeleton King is significantly more valuable than the regular Skeleton because of its spawning mechanic. One Skeleton King attacking your tower generates multiple Skeletons as backup, turning a single unit into a small army. This makes it harder to defend and more threatening on pushes. But, it costs 7 elixir, you can’t spam it, and it requires deck building around it as your primary win condition.
Comparison: The regular Skeleton is versatile but weak: Skeleton King is specialized and strong. Skeleton is a supporting cast member: Skeleton King is the protagonist. Decks built around Skeleton King play very differently than decks built around single Skeletons. The progression from Skeleton → Skeleton Army → Skeleton King → Giant Skeleton shows the theme’s evolution: you’re either going cheap and cyclic, or expensive and powerful.
Countering Skeleton-Based Decks
Area Damage Counters
Area-damage spells are the primary counter to Skeleton strategies. Fireball ($) deals 4-5 levels of area damage and can wipe out clusters of Skeletons instantly. Poison applies continuous area damage over time, killing Skeletons before they deal significant damage. Arrows, Log, and Zap are cheaper alternatives with slightly less coverage but faster cycling.
The effectiveness of these counters depends on skeleton density. A single Skeleton isn’t worth casting Fireball on, but ten Skeletons pushing with support? Absolutely. This is why Skeleton decks often pair their units with swarm-resistant cards, if your Skeleton cluster gets Fireballed, your Goblin Barrel or other spell-bait threats should still be alive to punish the opponent’s lack of defense.
For defensive Skeleton use, area-damage counters are less relevant because you’re not committing many Skeletons. A single Skeleton on defense doesn’t warrant a Fireball response. The counter works best against aggressive skeleton pushes where multiple units are grouped together.
Spell-Based Counters
Beyond area-damage spells, Tornado is particularly effective against Skeleton swarms. It pulls all the Skeletons to one location, away from their intended target, buying your tower time to defend or allowing you to follow up with area damage more effectively. Mirror or Clone on area-damage spells lets you double-cast them, wiping out even larger Skeleton clusters.
Single-target spells like Fireball ($) and Lightning work, but they’re inefficient against a single Skeleton unless you’re using them to kill the Skeleton and something else in the same location. Bait decks exploit this inefficiency, they run multiple small threats so that any single spell can only handle one, leaving the others alive.
The meta shifts based on what spells are popular. When area-damage is prevalent, Skeleton decks struggle. When single-target spells dominate, Skeleton swarms thrive. This is exactly why Clash Royale All Cards: exists, understanding the full card pool helps you build counters and adapt.
Unit Counters
Certain units directly counter Skeletons. Inferno Dragon ignores Skeleton swarms and burns down any large unit pushing with them. Electro Giant applies stun effects that disable Skeleton attacks momentarily. Tornado (not a unit but included for completeness) groups Skeletons for tower focus fire.
For single-Skeleton defense, most units can counter them, the Skeleton dies too quickly to matter. For Skeleton Army, units with area effect damage like Splash Damage or Poison are best. Dark Prince has splash and can walk through an Army, but he’ll take damage. Executioner swings AoE and can thin out Skeleton Army while walking forward.
The key insight: units that generate positive trades against swarms counter Skeleton-heavy decks. If you have a unit that trades 3 elixir for 5+ elixir of Skeleton value, you’re doing well defensively. This is why players studying What Is the Best often land on units with splash damage, they’re meta-counters to popular cheap-unit strategies.
Tips for Mastering Skeleton Card Placement
Optimal Placement Timing
Timing a Skeleton placement is about recognizing the threat before it becomes too late. Against a Hog Rider in the opposing lane, you don’t place your Skeleton preemptively, you wait for the Hog to cross the river, then place the Skeleton in its direct path. This minimizes the Skeleton’s travel time and maximizes the kiting effect.
On offense, you’re timing Skeleton placement to cycle faster. If you’re running out of elixir or want to reach a critical card in your deck rotation, you drop a Skeleton to “spend” the 1 elixir without committing to a major push. You’re cycling, not threatening. The opponent might ignore it entirely, or they might place a building to counter it, but either way, you’ve gained information and advanced your cycle.
In double-elixir, timing shifts. You have more resources, so you’re not cycling defensively as much. Instead, you’re using Skeletons to add pressure to pushes when the opponent is low on elixir. For example, if your opponent just spent 8 elixir defending a push, you have roughly 6-8 elixir of advantage. That’s when you drop a Skeleton with your next threat, forcing them to over-commit to defense or take massive damage.
Elixir Management with Skeletons
The 1-elixir cost is Skeleton’s superpower when it comes to elixir management. A cycle deck running Skeleton can rotate its win condition (e.g., Hog Rider) faster than decks that need 2-3 elixir filler cards. This means more Hog hits per game and faster tower damage accumulation.
But, elixir management requires discipline. It’s tempting to drop Skeletons constantly just because they’re cheap, but mindless spam wastes your advantage. You should have a reason for each Skeleton you place: cycling toward a critical card, defending a specific threat, or supporting a push. Random placements against nothing use up deck rotation without generating value.
Pro players track opponent elixir by watching deployment patterns. They know roughly when the opponent will have enough elixir for their next threat. Against a Golem deck, for example, they anticipate a Golem drop around the 9-10 elixir mark and ensure they have Inferno Dragon or another counter ready. Skeletons fit into this planning because they’re predictable and cheap, you can save them for critical moments or spam them when you want to burn elixir quickly without committing to expensive units.
Looking at competitive builds, players often study Golem Deck Strategies in and similar guides to understand how different archetypes manage resources. Skeleton placement within those meta decks follows the same principles: spend efficiently, support your win condition, and cycle toward defense before threats arrive. The skeletal framework of good play, pardon the pun, is consistent elixir discipline.
Conclusion
The Skeleton is a masterclass in card design, simple yet versatile, cheap yet impactful when used correctly. From cycle decks that leverage its speed to bait strategies that abuse its expendability, the skeleton from clash royale finds a home in multiple archetypes. Whether you’re defending against Hog Riders with a well-placed Skeleton kite or cycling your deck with 1-elixir filler, understanding this humble unit’s nuances separates casual players from competitors.
The key takeaway: Skeletons aren’t powerful on their own, but they’re powerful in context. Paired with the right cards, placed at the right time, and managed with elixir discipline, they’re the glue that holds strong decks together. Don’t overlook them because they’re cheap. Instead, respect their versatility and study how top players leverage them in different matchups.
As the meta evolves, and it always does in Clash Royale, Skeletons will continue to find relevance. The principles covered here (positive trades, kiting, cycling, bait synergies) are timeless. Master these concepts, and you’ll adapt quickly to whatever the next balance patch brings. The skeleton has endured since day one, and it’ll likely be here for years to come. Your job is to use it wisely.


