
Table of Contents
ToggleThe Hog Rider has been a fixture in Clash Royale since the game’s launch, and for good reason. This nimble, axe-swinging brute charges straight to the tower with relentless aggression, and when built into a cohesive deck, he’s practically impossible to ignore. Whether you’re grinding ladder at 5000 trophies or pushing toward 7000+, understanding how to leverage a Hog Rider deck can be the difference between stalled progress and consistent wins. The 2026 meta has refined hog strategies significantly, what worked last season might need tweaking, but the fundamentals remain solid. This guide breaks down multiple proven Hog Rider deck archetypes, from ultra-fast cycle variations to heavy beatdown pushes, with the exact card synergies, placement tactics, and decision-making frameworks you need to dominate your opponents.
Key Takeaways
- Hog Rider decks succeed through consistent pressure and cycling; sending him down the lane every 30 seconds forces opponents to bleed resources and creates constant chip damage.
- The classic Hog Rider cycle deck (2.6 average elixir cost) pairs Hog with Goblins and low-cost support cards like Log and Ice Spirit for rapid deck rotation and elixir efficiency.
- Counter Hog Rider threats like Inferno Dragon, Cannon, and Ice Golem by understanding interaction mechanics—use Goblins to force retargets, spells to damage support, and card synergies to maintain pressure.
- Bridge spam Hog Rider decks layer evasion units (Bandit, Ghost) to overwhelm defenders simultaneously, with Tesla and Inferno Dragon providing reactive defense between offensive pushes.
- Beatdown Hog Rider variants use 10+ elixir single pushes with Giant, Musketeer, and spells; Elixir Collector is critical to maintain a tempo advantage and fund massive attacks.
- Master the Hog Rider archetype that matches your playstyle—cycle for reactive speed, bridge spam for prediction, or beatdown for patient resource management—and grind 50+ games to refine matchup decision-making.
Why Hog Rider Remains a Top-Tier Win Condition
Core Strengths and Attack Patterns
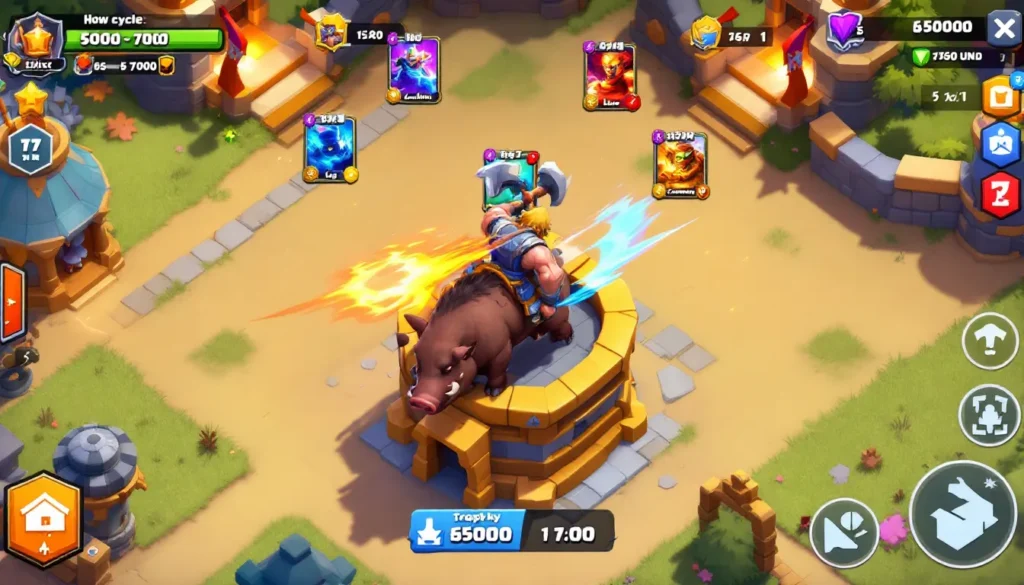
The Hog Rider costs 4 elixir and delivers raw, consistent pressure. His 188 hit points (at tournament standard) let him survive most single-target interactions, and his 1.6-second attack speed ensures chip damage even against defensive buildings. What separates him from other win conditions is his maneuverability, he doesn’t lock onto air units, so opponents can’t waste cards creating air distractions. He targets the closest building, which means smart placement from your side can force him down a specific lane.
His strength lies in repetition. Unlike Golem or P.E.K.K.A, which demand single massive investments, Hog Rider thrives in cycling. Send him down the lane every 30 seconds, and your opponent bleeds resources trying to stop him. That’s the core appeal: constant pressure without over-committing.
How to Counter Common Hog Rider Counters
The meta’s most popular Hog Rider stoppers are Inferno Dragon, Cannon, and Ice Golem. Understanding how to break through, or around, these tells the story of winning with hog decks.
Inferno Dragon is the hardest counter because it burns through HP quickly. The solution? Support your hog with a Goblins or Fire Spirits splash card. A single Goblins spawn forces the Inferno Dragon to retarget, buying your Hog the window he needs. Alternatively, pair your hog with Ice Spirit to freeze the Inferno and briefly interrupt its damage.
Cannon is more manageable. Hog Rider does 64 damage per swing: a level 9 Cannon has 388 HP. That’s six hits. Your opponent needs two cannons or a cannon + support. This is where Hog Rider + spell support becomes critical. A Log or Fireball can damage their support units while the Hog whittles the building. If they’re running Cannon, they’re likely low on air defense, exploit that lane choice.
Ice Golem slows your hog on death (it’s a death spawn effect). Pair your hog with a card that ignores the slowdown mechanic. Goblins are untargetable by the Ice Golem’s effect, so they keep pace. Goblin Barrel for chip follows up immediately. The lesson: understand the interaction mechanics, not just the card stats.
Mid-ladder defenders often stack multiple counters (Cannon + Mini P.E.K.K.A + Ice Spirit), which is overkill. That greed opens windows for split-lane or opposite-lane pressure. Hog Rider thrives against predictable, repetitive defense.
The Classic Hog Cycle Deck: Aggressive Speed Play
Card Synergies and Placement Tactics
The Hog Cycle archetype prioritizes speed and elixir efficiency. The gold-standard list looks like this:
- Hog Rider (4 elixir) – your win condition
- Goblins (3 elixir) – essential support for Ice Golem counter, helps cycle
- Log (2 elixir) – clears swarms and damages support
- Cannon (3 elixir) – your building-based defense
- Ice Spirit (1 elixir) – freezes pushes and cycles fast
- Fireball (4 elixir) – answers medium-HP threats (Barbarians, Knight)
- Skeletons (1 elixir) – cycle fuel and distraction
- Archers (3 elixir) – ranged defense and push support
The synergy is tight. Your average elixir cost sits around 2.6, meaning you cycle through your deck rapidly. Goblins + Hog is the signature combo: Goblins tank Ice Golem or Cannon, and the Hog finishes the job. Log removes Skeleton Army or Barbarians at the bridge, clearing space for your Hog.
Placement matters enormously. Deploy Goblins behind your Hog (not in front) when defending Hog decks, so they don’t soak damage first. Conversely, when you’re attacking, place Hog at the bridge and Goblins immediately behind, they cycle faster than typical spawning times, and they’ll meet him on his second or third swing.
Elixir Management and Rotation Strategy
Cycle decks reward ruthless elixir discipline. If you have 6 elixir and Hog + Goblins in hand (7 elixir cost), wait. Sending both is overcommitment. Instead, throw Hog alone and see their response. Did they Cannon? Log their follow-up. Did they ignore it? Play the Goblins as a distraction next rotation.
The golden rule: play one threat per cycle. One Hog every 30 seconds is pressure: two Hogs every 60 seconds looks scary but wastes elixir if the first one gets stonewalled. Offense comes from repetition, not bulk.
Defense eats elixir fast. If opponent plays Barbarians at bridge, you need Fireball + Log (6 elixir) to reset them. That stalls your Hog cycle by 3+ seconds. This is where trading value shines: Barbarians are 5 elixir: you spent 6 but added range advantage and card cycling. Your next Hog arrives while they’re rebuilding.
In single-elixir, be stingy. Drop defensive buildings early and cycle cheap cards. Double-elixir is your window. If you’ve maintained roughly 4-5 elixir, you can fire Hog + Goblins every 25 seconds. They can’t defend forever. This is the archetype’s lethal tempo.
Mid-Ladder Hog Rider Decks: Accessible and Effective
Supporting Cards for Reliable Damage
Mid-ladder (4500–6000 trophies) players often lack the legendaries or card levels for cycle perfection. A more accessible Hog Rider deck leans on common and rare supports that do the heavy lifting:
- Hog Rider (4 elixir)
- Barbarian Barrel (3 elixir) – Log alternative with extra utility
- Knight (3 elixir) – tank, soaks tower shots
- Goblins (3 elixir) – distraction and cycle
- Valkyrie (4 elixir) – AoE melee unit, excellent vs. swarm
- Zap (2 elixir) – stun and damage
- Hog Rider (duplicate option) – yes, some mid-ladder decks run two Hogs
- Musketeer (4 elixir) – sustained ranged DPS
The difference here is supporting cards do more work. Instead of hoping Goblins alone stop the counter, you can play Knight + Goblins as a tanky defensive wall. Valkyrie nullifies swarm defense, so opponent can’t mass Skeletons or Goblins, your Hog has a clearer path.
Barbarian Barrel is underrated at mid-ladder. It’s 3 elixir like Log, but it leaves a Barbarian behind. Against Barbarians at bridge, you Barbarian Barrel and now you have a melee unit tanking while your Hog swings. It’s a swing trade (they spent 5 elixir, you spent 3, but your unit stays).
Common Matchups and How to Adapt
Mid-ladder sees a chaotic meta, everything from Sparky beatdown to Three Musketeers split-lane. Here’s how to adapt your Hog Rider deck:
vs. Sparky Beatdown: Sparky is 6 elixir and melts your frontline. Don’t let it reach the bridge. Play Knight or Valkyrie far from Sparky’s attack line to distract it: meanwhile, cycle a cheap Zap to stun it. Your Hog Rider thrives while they’re committing to Sparky. Pressure opposite lane.
vs. Three Musketeers: This is a hard counter if they split the Musketeers across the map. Don’t overcommit to one lane. Instead, cycle small Hogs and force them to defend both lanes. Zap one Musketeer stack and push the opposite lane with Hog + Knight. They’re stretched thin.
vs. Mega Knight: Mega Knight (7 elixir) has knockback on spawn, so he pushes your Hog away. Use Goblins to bait the knockback, then send your Hog. Or use Valkyrie to tank his damage while Hog finishes a tower. Don’t panic-defend: this is your chip damage window.
vs. Giant beatdown: Giants have high HP but no speed. Distract with Knight at bridge, then Hog opposite lane. They can’t defend both. If they support the Giant with Baby Dragon or Witch, use Zap to stun them and cycle your Hog faster. Remember, at mid-ladder, opponents overcommit, exploit that.
The meta at this trophy range rewards efficient trades and pressure. Hog Rider’s 4-elixir cost is perfect for constant resets. Your job is to survive their push and hit their tower just enough times. A Hog hitting tower 10 times at 100+ damage per swing deals 1000+ chip, that’s a quarter tower, often backed by their own elixir deficit.
Hog Rider Bridge Spam: Control the Pace of Battle
Building Pressure and Defensive Value
Bridge spam decks send multiple units to the bridge simultaneously, overwhelming defenders through sheer volume. Hog Rider fits naturally here. The archetype shifts the game’s tempo, instead of cycling single Hogs, you’re creating pockets of overwhelming pressure.
A typical Bridge Spam Hog list includes:
- Hog Rider (4 elixir)
- Bandit (3 elixir) – dashes to targets, untargetable mid-dash
- Ghost (3 elixir) – invisible, phasing unit
- Goblin Gang (3 elixir) – swarm with Spear Goblins
- Ice Spirit (1 elixir) – freeze on hit
- Inferno Dragon (4 elixir) – defensive anchor
- Arrows (3 elixir) – swarm clear
- Tesla (4 elixir) – hidden building defense
The magic is layering evasion. Bandit dashes past the first defense: Ghost phases through single-target threats: Hog smashes buildings. Your opponent guesses wrong, and two or three threats breach simultaneously.
Defensively, Tesla and Inferno Dragon create a safety net. Tesla locks onto invisible Goblins or sneaky Miner plays, while Inferno Dragon burns through heavy pushes. Arrows handles splash threats. Your defensive posture is reactive, you let opponents spend, then counter-push with a Hog + Ghost or Hog + Bandit combo.
Timing and Positioning for Maximum Impact
Bridge spam is tempo-dependent. You can’t spam indiscriminately: you need windows. After defending a push, you should have 5+ elixir and both lanes clear. That’s the moment: Hog at bridge, Bandit in the same lane behind him, Ghost opposite lane. They’re forced to choose.
Positioning the Hog: Don’t place him center-bridge every time. If you know they’re running Cannon, place your Hog one tile left or right of center. Now they can’t Cannon your Hog and defend Bandit simultaneously. They choose one: the other damages the tower.
Timing the Ghost: Ghost is invisible for 2 seconds after deployment. Send Ghost to the opposite lane just before your Hog arrives. By the time it becomes visible, they’ve already committed to defending the Hog. Ghost surprise-swings for 300+ damage.
Managing double-elixir: This is bridge spam’s golden hour. You can afford Hog (4) + Bandit (3) + Ghost (3) + Ice Spirit (1) = 11 elixir, but elixir generation is 1/second, so you’re looking at a 22-second push if they defend perfectly. Instead, stagger: Hog + Bandit first (7 elixir), wait 4 seconds (4 elixir regenerated), Ghost + Ice Spirit (4 elixir). The split timing forces two separate defensive responses, multiplying confusion.
Reading opponent reactions: If they Inferno Dragon your Hog, that’s 4 elixir spent. You immediately play Bandit bridge: they likely don’t have a unit ready. Bandit swings twice, deals 300+ damage. Next cycle, Inferno is back, but now you have Ghost ready. These micro-interactions, one card forcing a response, opening lanes for the next, define bridge spam mastery. The Hog initiates: his teammates finish.
Advanced Hog Rider Beatdown Variants
Heavy Tank Support and Spell Coverage
Beatdown decks sacrifice speed for raw firepower. Instead of cycling cheap cards, you invest 10+ elixir into a single push, trusting your support to overwhelm. Hog Rider here plays a secondary role, the tank soaks damage, while Hog Rider finishes towers caught off-guard.
A high-ladder beatdown Hog list might look like:
- Hog Rider (4 elixir)
- Giant (5 elixir) – your primary tank
- Musketeer (4 elixir) – ranged DPS
- Dark Elixir cards like Dark Elixir Decks in offer alternative support frameworks
- Fireball (4 elixir) – spell support for grouped enemies
- Tornado (3 elixir) – pull and reset, premium utility
- Elixir Collector (5 elixir) – ramp advantage
- Mega Knight (7 elixir) – win condition pivot
This deck’s philosophy: sacrifice tempo, gain value. You’re not hitting their tower every 30 seconds: you’re hitting it hard every 90 seconds. When Giant + Musketeer + Hog Rider + Fireball reaches the bridge, that’s 16 elixir of investment. Their tower is half-health or gone.
Spell coverage is critical. Fireball and Tornado synergize with a stacked push. Your Giant walks down, attracting their defense. Tornado pulls their Barbarians or Mini P.E.K.K.A into a clump: Fireball hits the clump and damages your Giant’s support simultaneously. Meanwhile, your Musketeer and Hog handle isolated units.
Elixir Collector is the tempo equalizer. They cost 5 elixir but generate 1 extra elixir per second, over 60 seconds, that’s 60 extra elixir. If you can defend and protect it, you’ll out-elixir your opponent by 50+ points. That funds your next massive push.
Tournament and Ladder Success Tips
High-ladder (6500+) demands precision. Beatdown Hog Rider decks face cycle decks and what is the best card in clash royale, which means tight elixir management is non-negotiable.
Tip 1: Place the Elixir Collector immediately. In single-elixir, drop it at the back of your side, far from their side. They can ignore it, but then you’re out-elixiring them. If they Fireball it immediately, they’ve spent 4 elixir on 5-elixir worth of value (collector + 20 elixir generated before placement). You’re ahead.
Tip 2: Don’t push until you have a 2+ elixir lead. If they just spent 6 elixir defending, don’t immediately play your Giant (5). Wait 8-10 seconds for elixir to regain. Push when you’re at 8+ and they’re likely at 4-5. The disparity means they can’t defend optimally.
Tip 3: Use Hog Rider as a finisher, not a primary tank. In a Giant + Musketeer push, your opponents target the Giant. Once it dies, your Musketeer and Hog are still alive, 3+ tiles from their tower. They’ve burned elixir on the Giant: they’re low on defend. That’s when Hog punishes.
Tip 4: Master Tornado mechanics. Tornado (3 elixir) pulls all units toward it. If your Giant walks straight and their Knight and Archers cluster on the left side, Tornado pulls them center. Now they’re stacked, and Fireball hits all three. This one play, Tornado pull into Fireball, wins games because it converts their multibody defense into a wasted elixir dump.
Tournament play is different from ladder because card levels are standardized (tournament standard). Your cards hit hardness benchmarks: Hog Rider at 188 HP survives most interactions predictably. This means matchup percentages are clearer. A Hog + Giant beatdown into Lumberjack Clash Royale: Master defensive lists has a known outcome. The player who manages elixir and timing better wins.
Recent tournament data (via Game8) shows beatdown Hog decks have a 52-55% win rate when piloted by experienced players, higher in single-elixir phases. The margin is small because cycle decks punish greed, but patience and Elixir Collector usage tip the scales toward beatdown at high levels.
Conclusion
Hog Rider’s dominance in Clash Royale stems from his unmatched consistency and versatility. Whether you’re cycling fast in a lean 2.6 average elixir deck, stacking threats in bridge spam, or leveraging him as a finisher in beatdown, the Hog rewards smart placement, elixir timing, and understanding opponent matchups.
The 2026 meta has matured beyond “just spam Hog.” Success requires reading your opponent’s deck archetype, anticipating their defensive patterns, and capitalizing on windows. A cycle Hog player thrives against greed: a bridge spam player dominates against indecisive defenders: a beatdown Hog player punishes overcommitment on offense.
Start with the archetype that matches your playstyle and card collection. If you prefer fast, reactive gameplay, master the cycle deck, it’s forgiving and teaches timing fundamentals. If you like resource-heavy pressure, bridge spam rewards prediction and micro-management. If you’re patient and methodical, beatdown separates skilled players from the rest.
The best Hog Rider deck is the one you can pilot consistently. Theory without execution is worthless. Pick your variant, grind 50+ games, learn the matchups, and refine your decision-making. The tower damage will follow. Visit Pocket Tactics or Twinfinite for additional Clash Royale guides and meta shifts, and remember, card levels matter, but game sense matters more. A well-timed Hog Rider at 5000 trophies will always beat panic defense. Make that work for you.


